Scheduler Zoom Integration in Groove
Updated August 22, 2024
Continue to book more meetings with less effort using our latest integration with Groove Scheduler and Zoom. Eliminate the time-consuming need to add a meeting link after a meeting is booked by automatically generating a unique Zoom meeting link every time a meeting is booked using the Groove Scheduler.
How it works
Connecting to Zoom:
Before utilizing the Zoom Integration within Scheduler, we will need to connect your Zoom account to Groove.
-
Navigate to User Settings
-
Scroll down to 'Connected Accounts'
-
In the Zoom section, click on the Zoom button to connect your account
-
Follow the instructions on the screen to authorize Groove
Using the Integration:
Once you are connected, you will see a new section in your Meeting Type Settings within Scheduler Settings named Video Conferencing.
-
Within that section, you will see a button for Zoom
-
Once that button is selected (blue outline), and the Meeting Type is saved, that Meeting Type will start generating Zoom links when booked
-
The location is automatically populated with the meeting link, but if you would like to add an additional location, you will be able to do that. The Zoom link will still be accessible in the meeting details.
-
Note: You will need to follow these instructions for each meeting type you would like to apply this video conferencing.
Uninstalling and Disconnecting:
-
Navigate to User Settings
-
Scroll down to 'Connected Accounts'
-
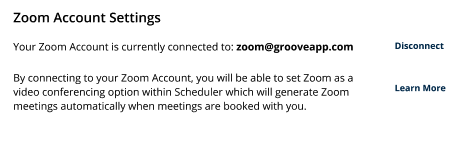
In the Zoom section, click on the 'Disconnect' button to disconnect your Zoom account from Groove
Additionally, you can also disconnect from your Zoom settings:
-
Login to your Zoom Account and navigate to the Zoom App Marketplace
-
Click Manage > Installed Apps or search for the Groove app
-
Click the Groove app
-
Click Uninstall
Important Information to Note:
-
Depending on your organization's Zoom settings, an Admin may need to pre-authorize the Zoom application before connecting will be possible.